


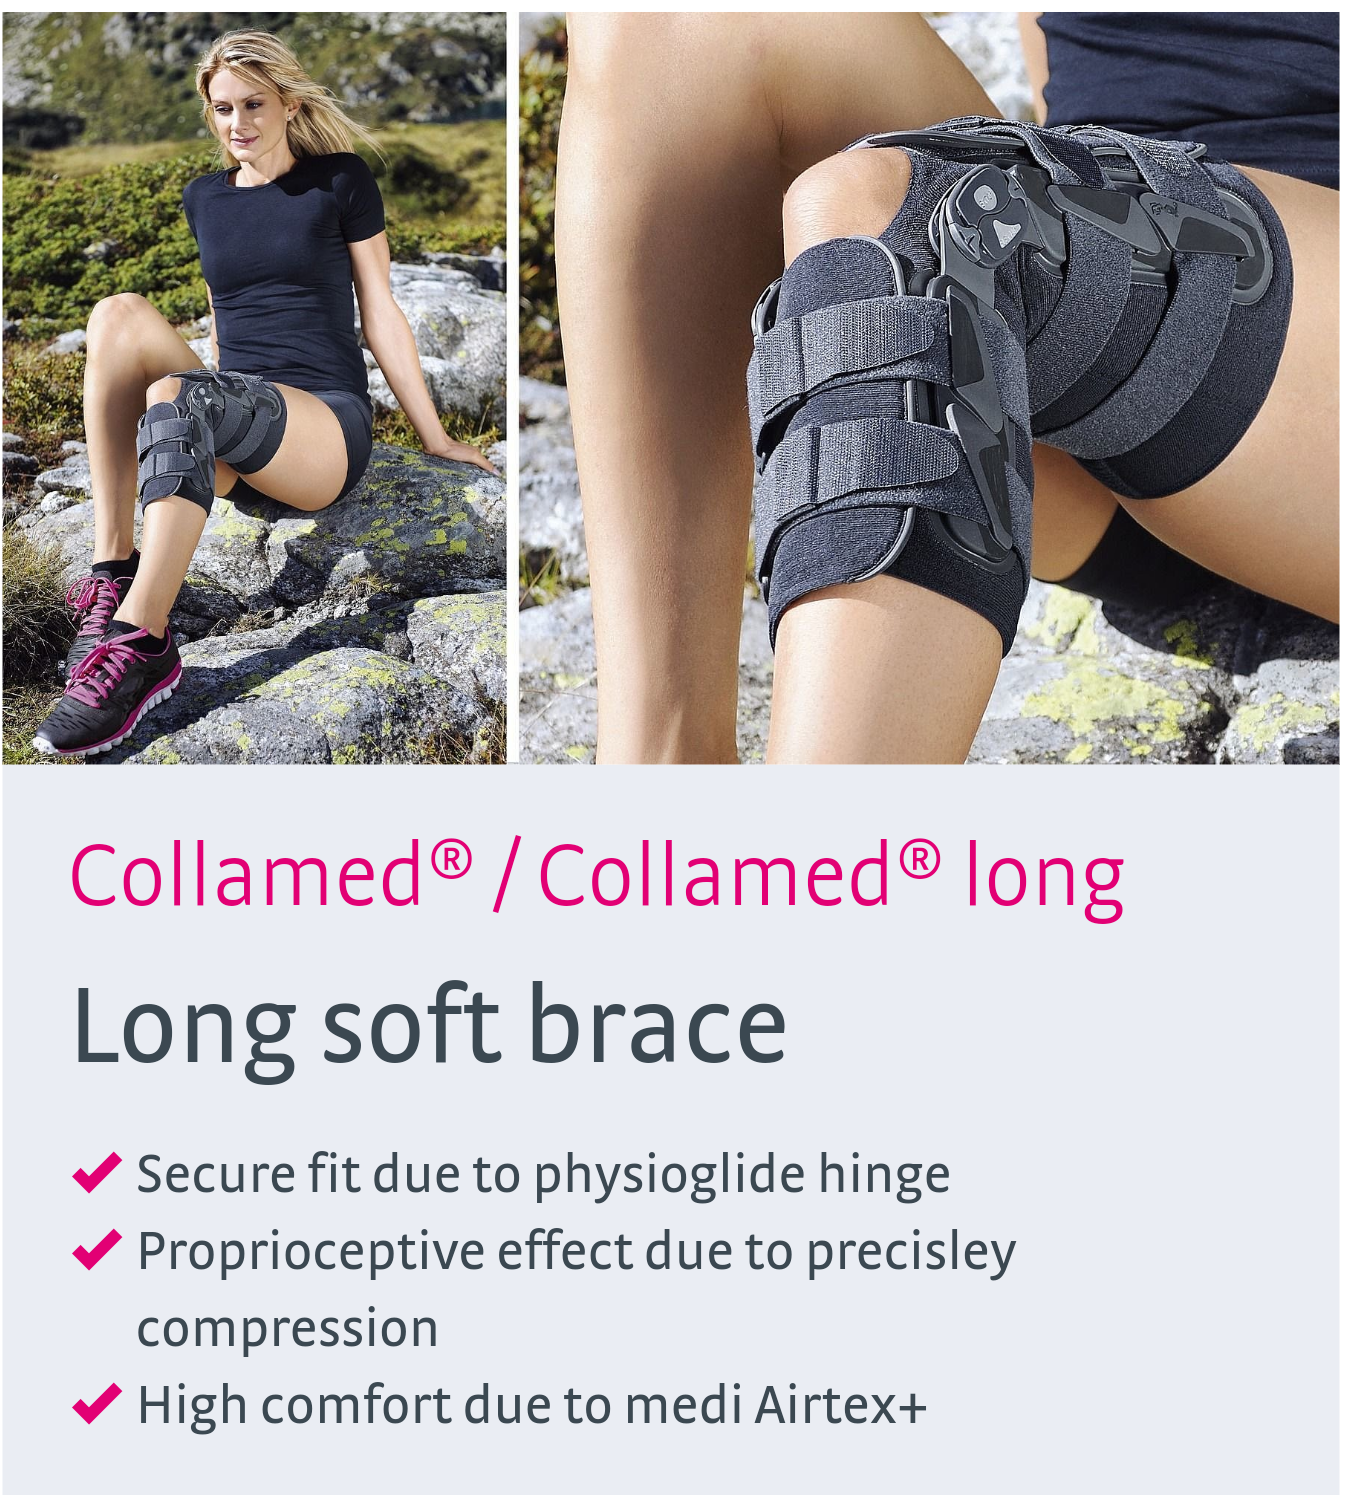


Product benefits
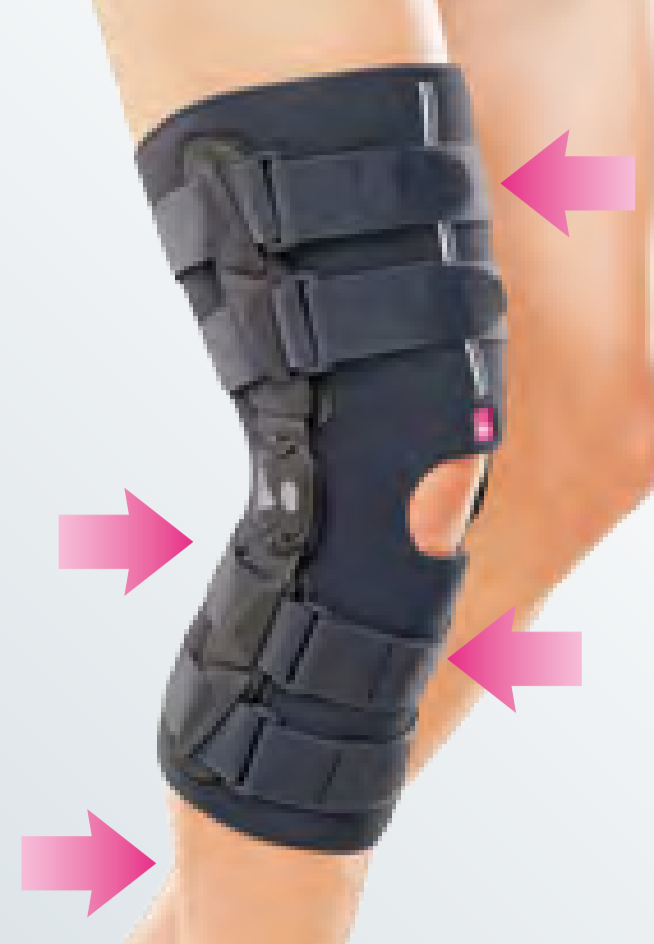
Optimal stabilisation using 4-point principle
Safe collateral stabilisation by riged Frame
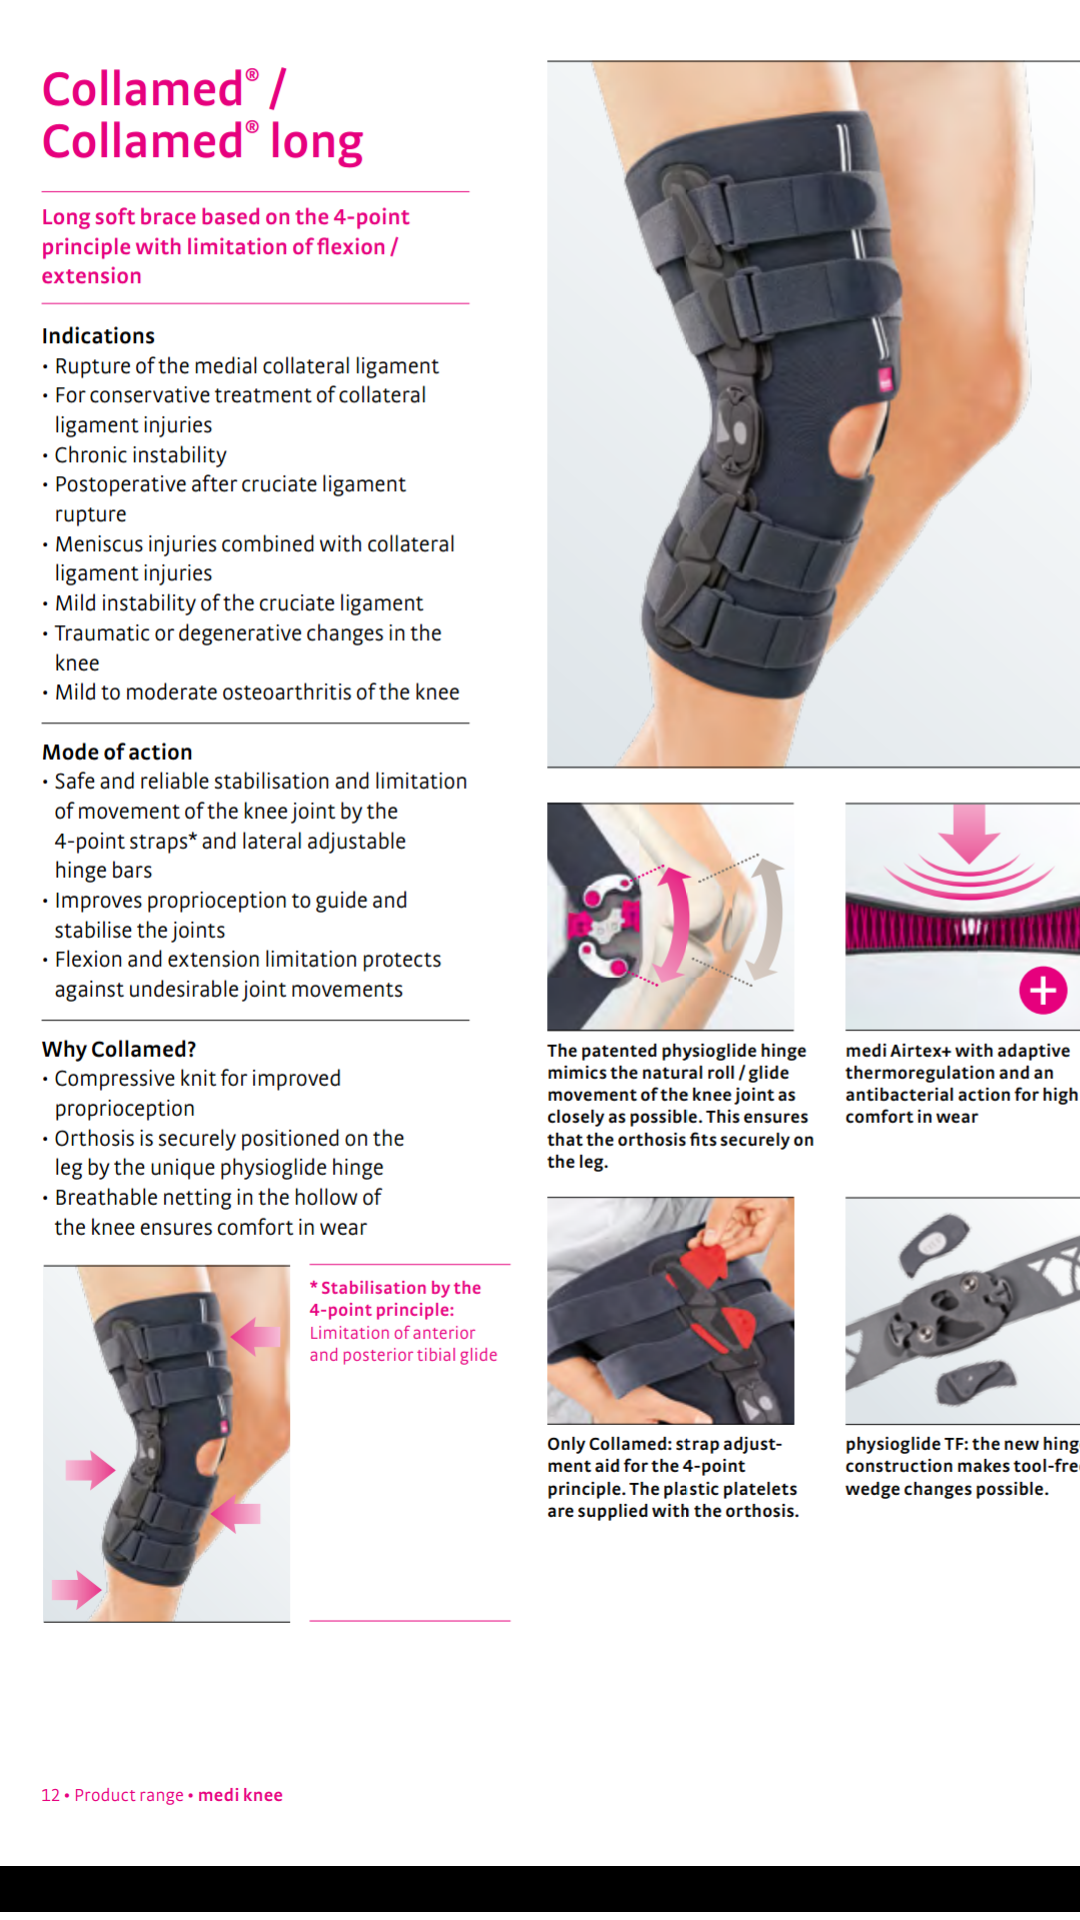
Extension and flexion limitation protects against damaging joint movements and relieves injured structures
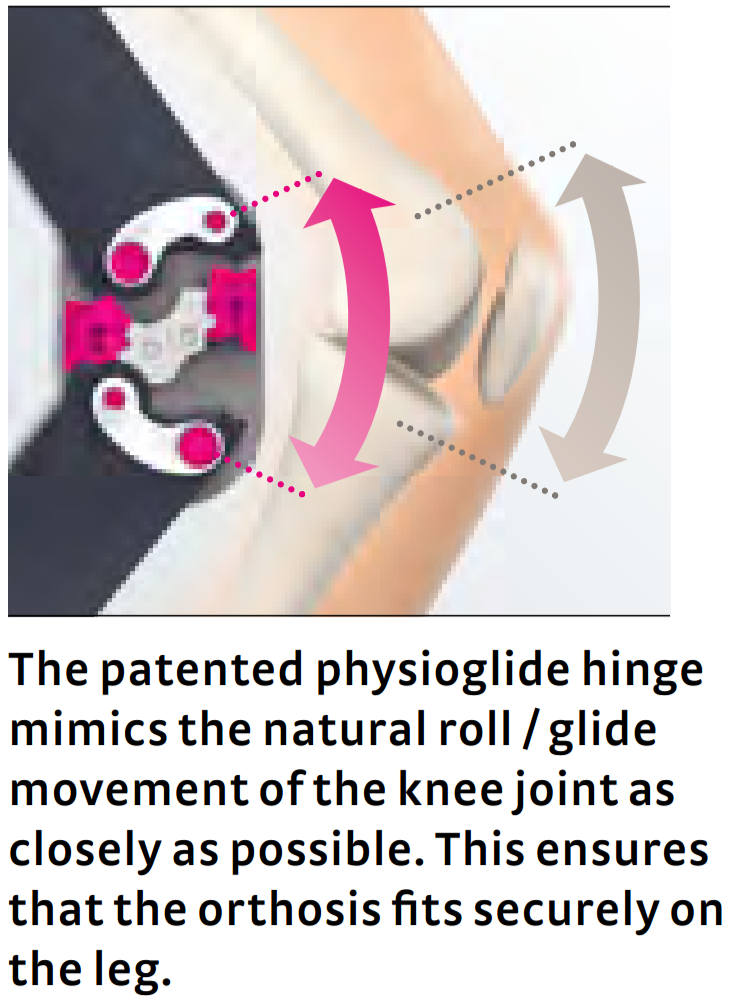
Improvement of propriocetion to increase the own guidance and stabilisation of knee joint
Prevention of hyperextension
Limitations:
- Extension limitation at: 0°, 10°, 20°, 30°
- Flexion limitation at: 0°, 10°, 20°, 30°, 45°, 60°, 75°, 90°
- Immobilisation: 0°, 10°, 20°, 30°
Donning/fitting instructions
Undo all straps and the two the hook and loop fastener strips. Please put the two enclosed small synthetic plates between the strap and the strap tracking. Pull the straps back toward the back so that they will not interfere with you putting on the brace. Now put your leg into a 45-degree angle flexion position. Wrap the brace tightly around your leg from the back and close it with the two the hook and loop fastener strips. Make sure that the kneecap is positioned centrally in the space for the patella. Position the brace so that the middles of the hinges are level with the upper border of the kneecap and just behind the lateral centre line of the leg. First fasten the lower calf strap in the front and then the lower calf strap in the back. Now fasten the upper thigh strap and remove the small synthetic plates. In the following, close the strap directly below the kneecap in the front and then the corresponding strap in the back. Finally, close the one remaining lower thigh strap and also remove the small synthetic plate. If possible, walk a few steps to check that the brace is in the correct position. Please adjust the position as required.
Wearing directions
Only change the extension and flexion limits on instruction from your doctor or orthotist. In order to prevent hyperextension, always insert extension stops or 0° stops. The stops define the exact excursion of the orthosis. In difficult soft-tissue conditions, e.g. where the soft-tissues are under com press ion, it may be necessary to insert a larger stop to limit the joint movement to the desired excursion. In addition, make sure that the orthosis hinges are correctly positioned: the middles of the hinges should be in one line with the upper border of the patella. The hinge must lie behind the midline of the leg.
콜라메드
제품의 장점
4-포인트 원리를 이용한 최적의 고정
지지대 프레임을 이용한 안전한 이차적 고정
신전고 굴곡 제한은 관절 손상을 일으키는 움직임을 제한하고 손상된 조직의 통증을 완화
고유감각의 개선은 무릎 관절의 자의적 움직임과 고정 능력을 향상
괴신전 방지
제한 각도:
- 신전 제한 각도: 0°, 10°, 20°, 30°
- 굴곡 제한 각도: 0°, 10°, 20°, 30°, 45°, 60°, 75°, 90°
- 고정 각도: 0°, 10°, 20°, 30°
착용성 / 착용 방법
모든 벨크로 스트랩을 풀어주시고 부목을 완전히 펼쳐주세요. 스트랩의 밸크로 부분을 접어 부착한 다음 스트랩을 뒤로 최대한 널널하게 당겨 부목을 착용하는 동안 방해가 되지 않게 해 주십시오. 이제 다리를 45도 각도로 구부려준 다음 무릎 뒤로 부목을 다리에 감싸며 부목의 몸체 벨크로를 잠가주십시오. 무릎뼈가 슬개골 구멍 중앙에 자리하고 있는지 확인해주십시오. 부목을 힌지의 중앙이 무릎뼈 상단 끝 부분과 다리의 측면 중심선과 같은 높이에 위치하도록 하시길 바랍니다. 먼저 종아리 가장 아래 전면 스트랩을 잠가준 다음 후면 하단 스트랩을 닫아 줍니다. 이후 제일 허벅지 제일 상단의 스트랩을 닫아주고 주황색의 플라스틱 탭을 제거해주십시오. 이어서 무릎 바로 아래 스트랩을 잠그고 바로 뒤에 있는 스트랩도 잠가줍니다. 마지막으로 남은 무릎 위 스트랩을 고정하신 다음 주황색 플라스틱 탭을 제거하십시오. 가능하명 몇 걸음 걸어보고 부목이 올바르게 착용이 되었는지 확인하시기 바랍니다. 필요할 경우 위치를 재조정하십시오.
착용 유의사항
굴곡 및 신전 제한 각도는 주치의 또는 지정 전문가의 지시 하에서만 조정하시기 바랍니다. 과신전을 예방하기 위해 항상 신전 방지탭 또는 0도 탭을 꼭 끼워주십시오. 방지탭은 부목의 정확한 운동 범위를 규정하는 역할을 수행합니다. 적용이 어려운 연조직 증상 (예: 연조직에 압박이 가해지고 있는 상황)에는 원하는 신전에 관절의 움직임을 제한하고 싶을 경우 더 큰 방지탭을 설정해야 할 것입니다. 또한 부목의 힌지가 정확한 위치에 자리하고 있는지 확인하십시오: 힌지의 가운데는 슬개골 상단 끝 부분과 같은 높이에 위치하고 있어야 합니다. 힌지는 다리의 정중선 뒤에 있어야 합니다.
콜라메드